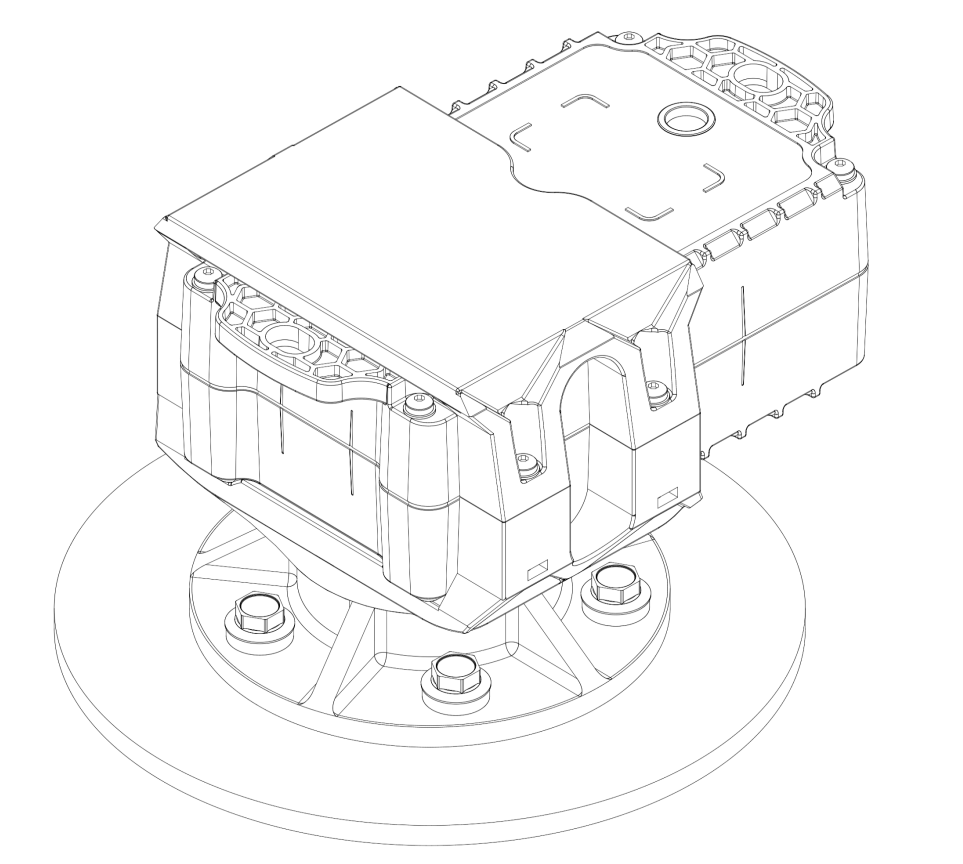
IoT Pro Installation Options
Option 1: Plastic anchors
This installation method is preferred when the IoT Pro must be installed onto a concrete/ stone wall/ drywall/ brick wall
What you’ll need
2x Plastic Anchors (https://eshop.wuerth.com.mt/nail-anchor-w-znd-type-sk-13)
2x M6 Flat Washers (https://eshop.wuerth.com.mt/flat-washer-for-hexagon-bolts-and-nuts-44)
8 mm Masonry Drill Bit (https://eshop.wuerth.com.mt/duo-s-impact-drill-bit-with-straight-shank-5)
Philips Screwdriver
Installation Instructions
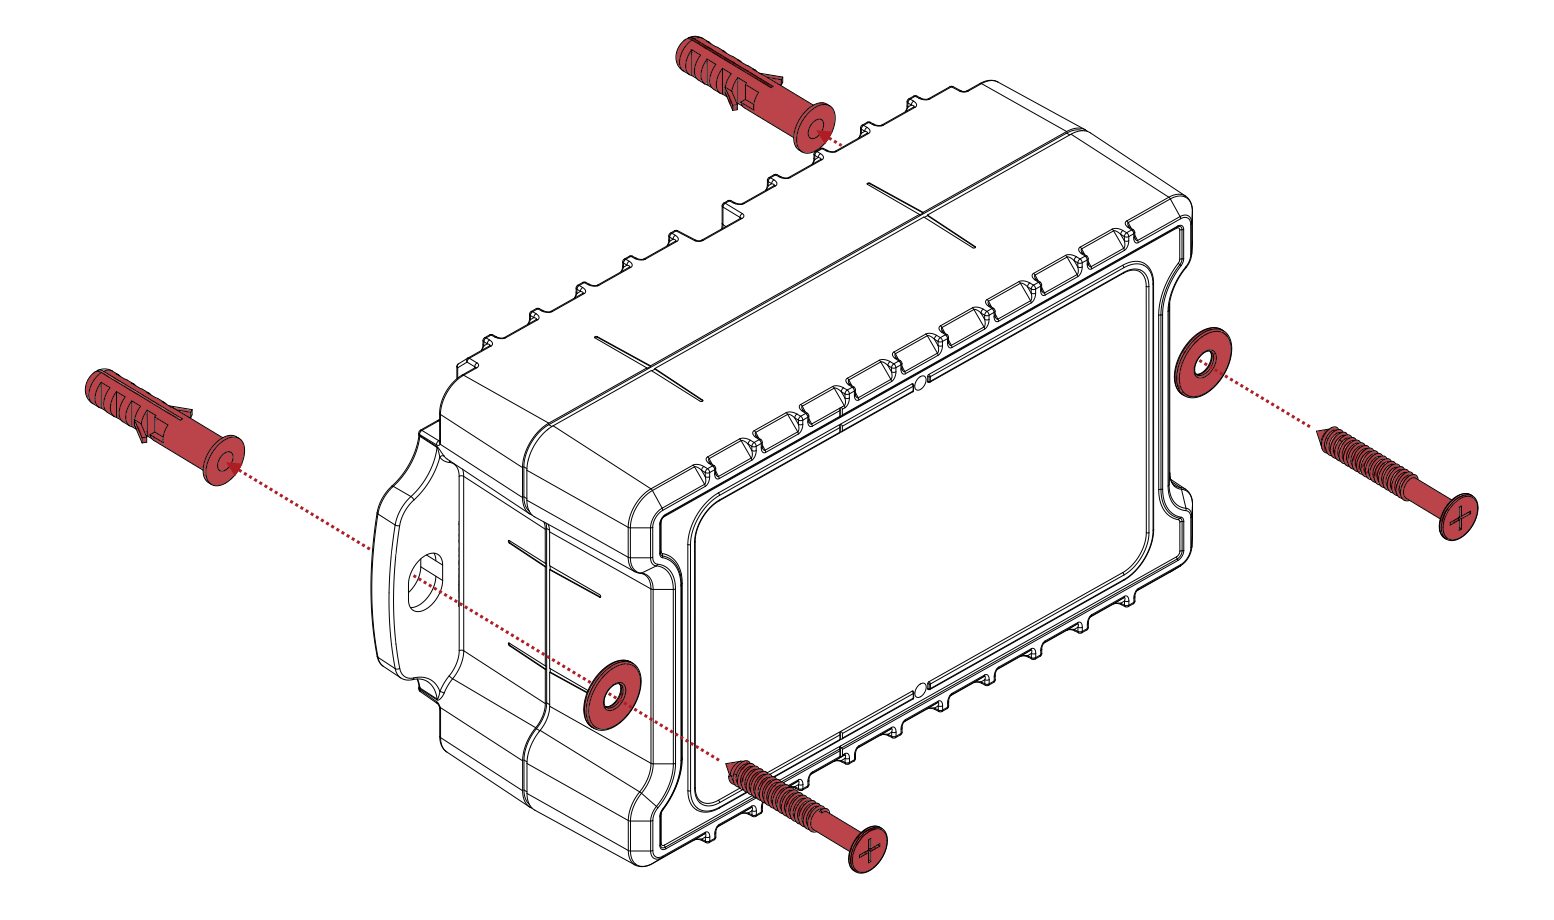
Place your device in the intended location and mark the centers of the two mounting holes on the intended surface
Use the 8 mm drill bit to drill two 45 mm deep holes at the marked locations
Clean the drilled holes thoroughly
Remove the screws from the plastic anchors
Insert the anchors into the drilled holes
Place your device at the intended location
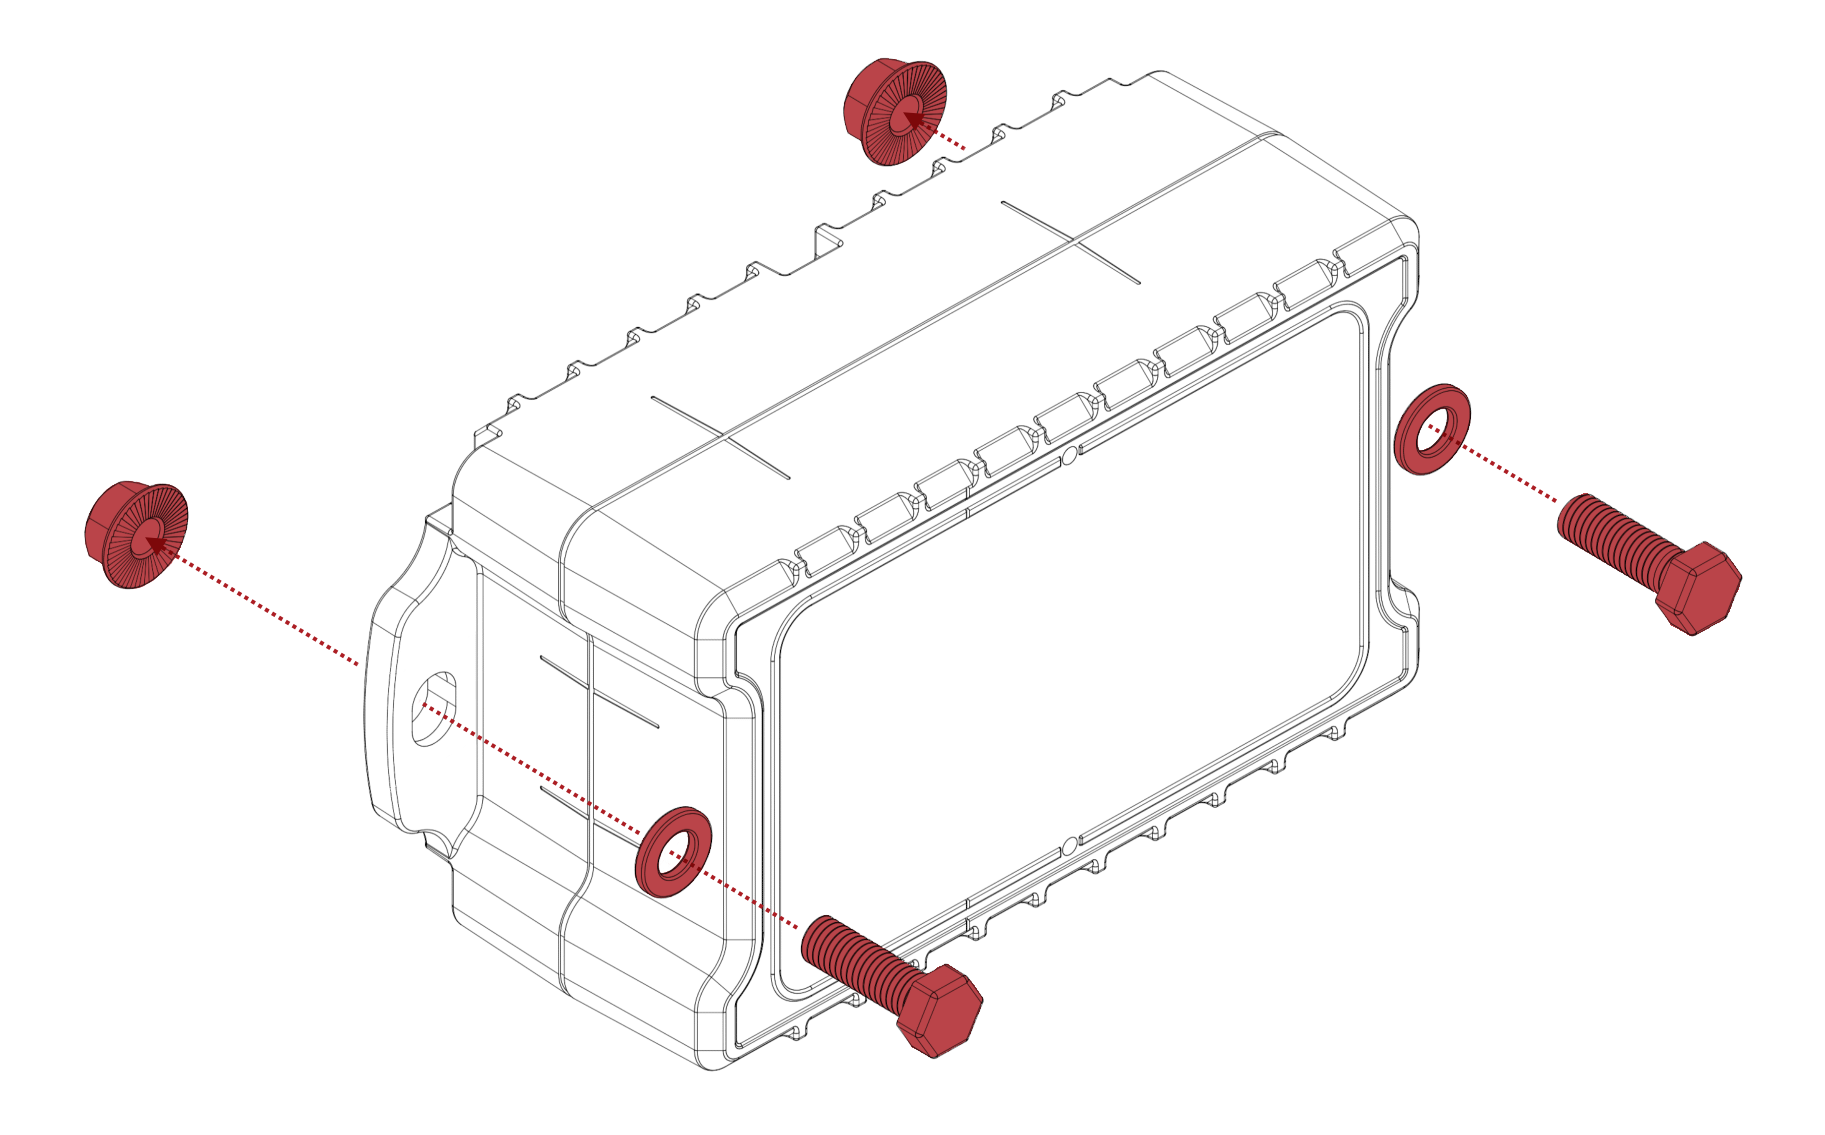
Pass the screws through the washers and into the plastic anchors as shown below
Drive in the screws with the Philips screwdriver until flush with your device
Option 2: Self-drill screws
This installation method is preferred when the IoT Pro must be installed onto a fiberglass/ metal/ aluminum/ plastic surface
What you’ll need
8 mm Hexagon Socket
Installation Instructions
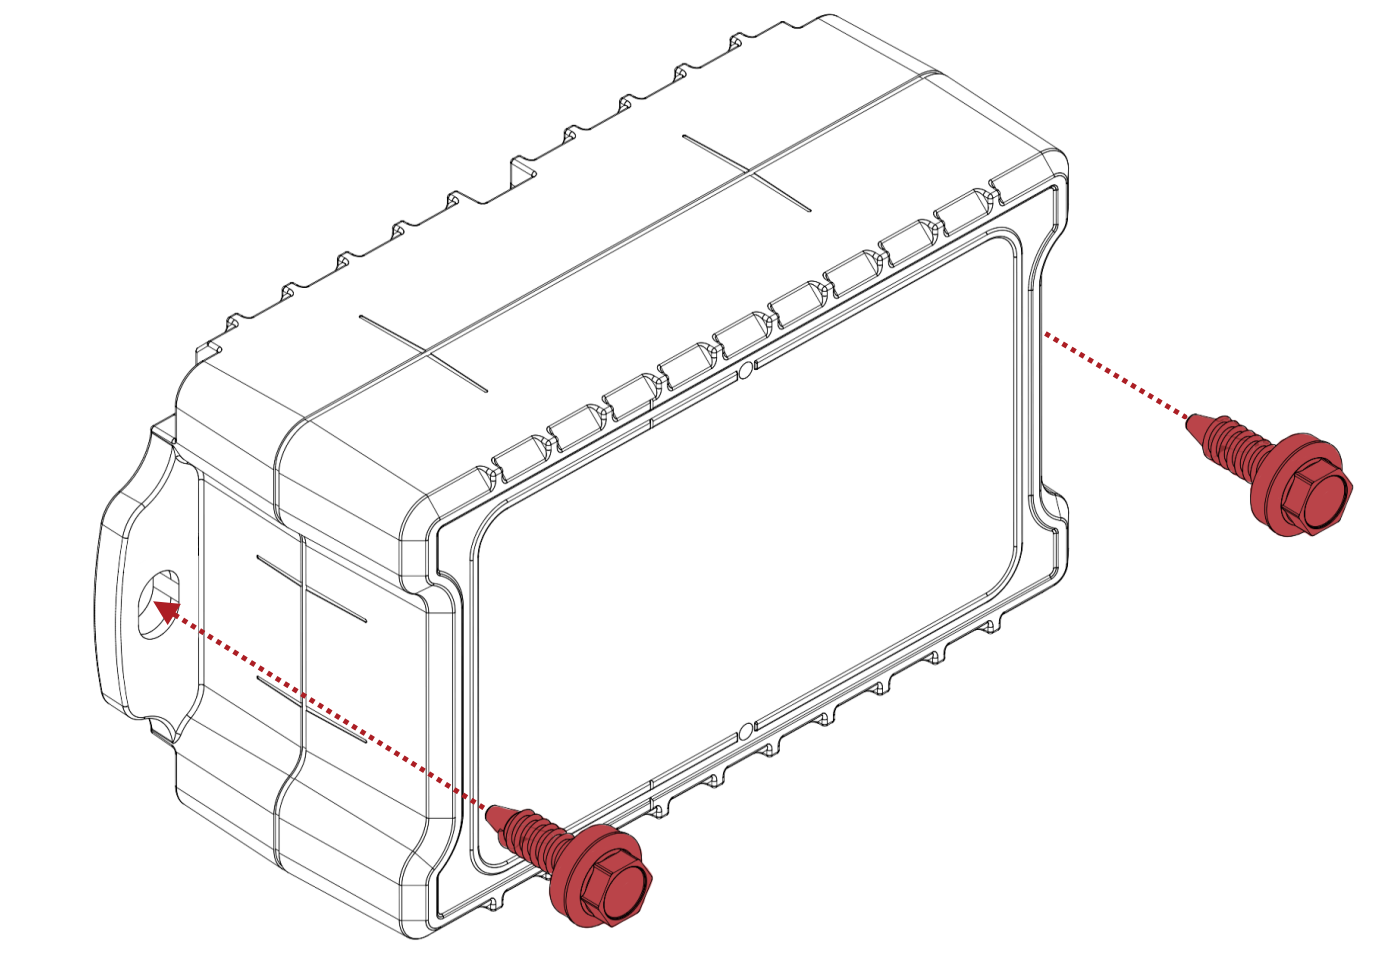
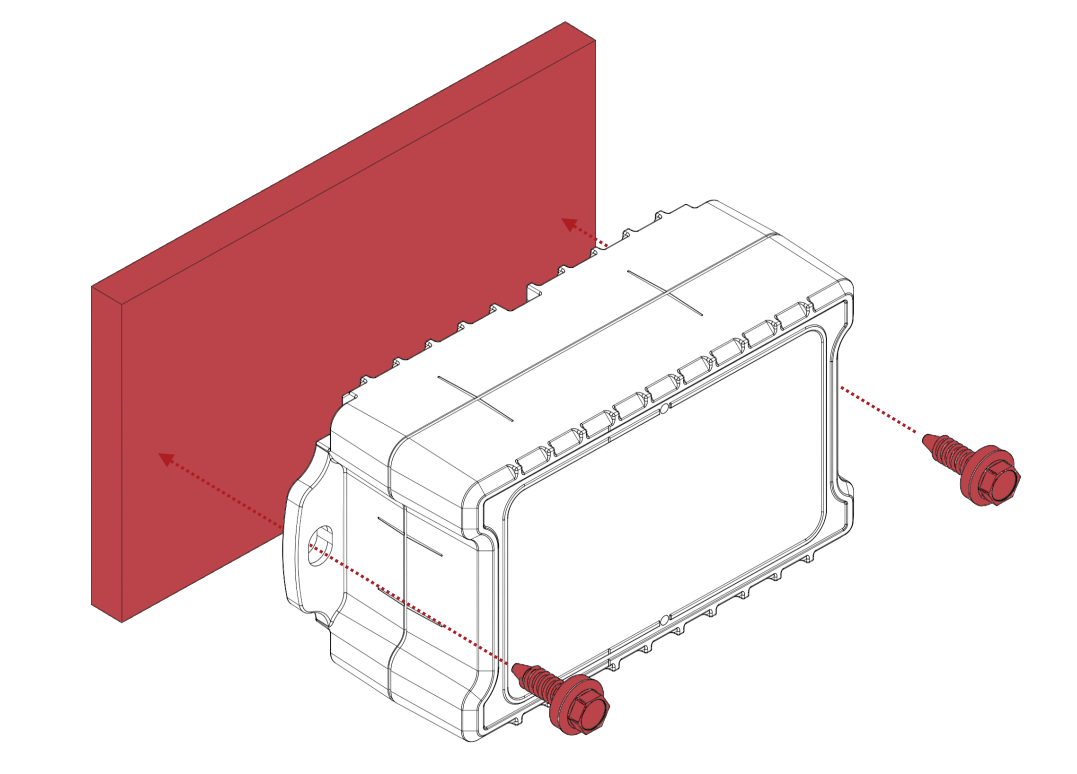
Place your device in the intended location
Attach an 8 mm hexagon socket to a drill driver
Drill the two self-drill screws into the surface as shown below
Option 3: Cable ties to a flat surface
This installation method is preferred when the IoT Pro must be installed onto a cable tray or a similar flat surface
What you’ll need
2x Cable Ties (length provided according to customer requirements)
Installation Instructions
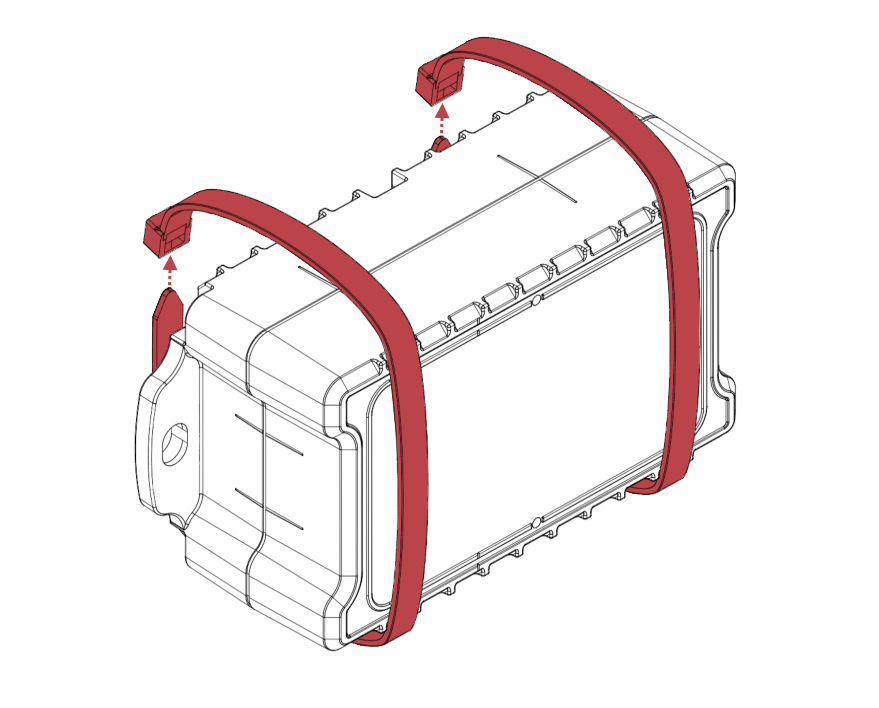
Identify the intended location for the installation
Use two cable ties as shown to install your device
Ensure that the device is attached securely before proceeding
Option 4: Cable ties to a pipe or curved surface
This installation method is preferred when the IoT Pro must be installed onto a thick pipe or curved surface
What you’ll need
1x Custom Spacer (designed and produced to customer requirements)
2x Cable Ties (length provided according to customer requirements)
Installation Instructions
Identify the intended location for the installation
Get in touch with our team members from IoT Solutions Website - Contact Us to design the custom spacer for your installation
Use two cable ties and the custom spacer as shown to install your device
Ensure that the device is attached securely before proceeding
Option 5: Bolted in place
This installation method is preferred when the IoT Pro must be installed onto a surface which can be accessed from the front and back
What you’ll need
2x M6 Bolts (length provided according to customer requirements)
2x M6 Flat Washers (https://eshop.wuerth.com.mt/flat-washer-for-hexagon-bolts-and-nuts-44)
2x M6 Serrated Nuts (https://eshop.wuerth.com.mt/serrated-locking-nut-4)
6.5 mm Drill Bit (bit material should be selected according to the installation medium)
10 mm Hexagon Socket
10 mm Spanner
Installation Instructions
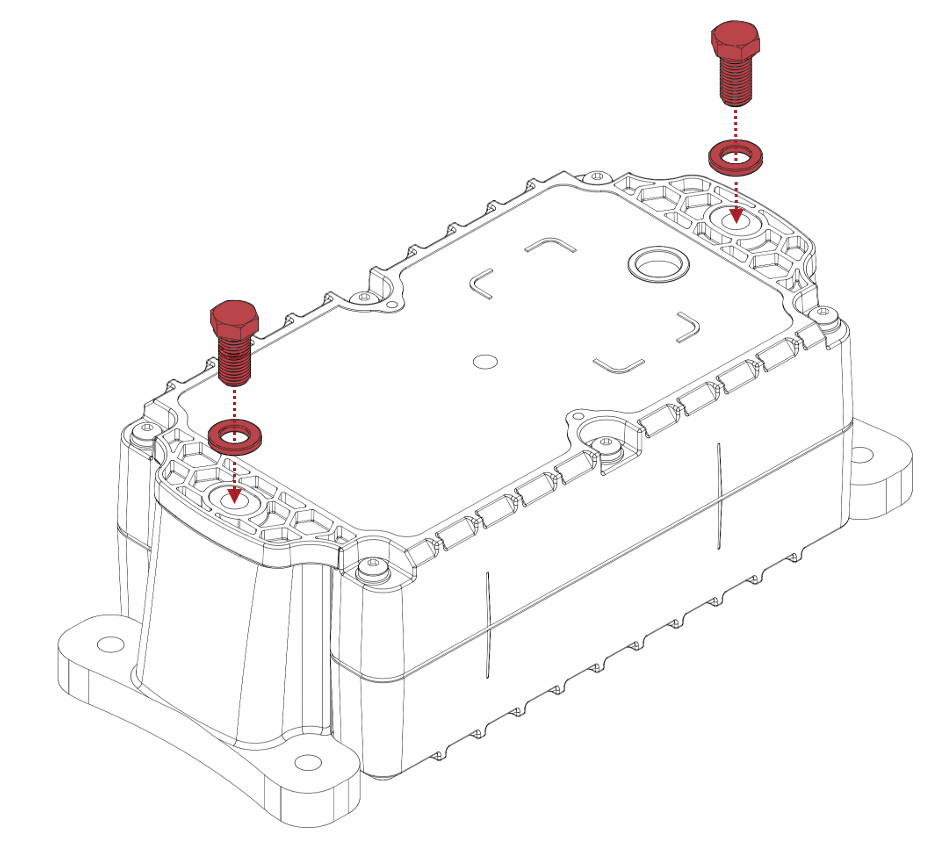
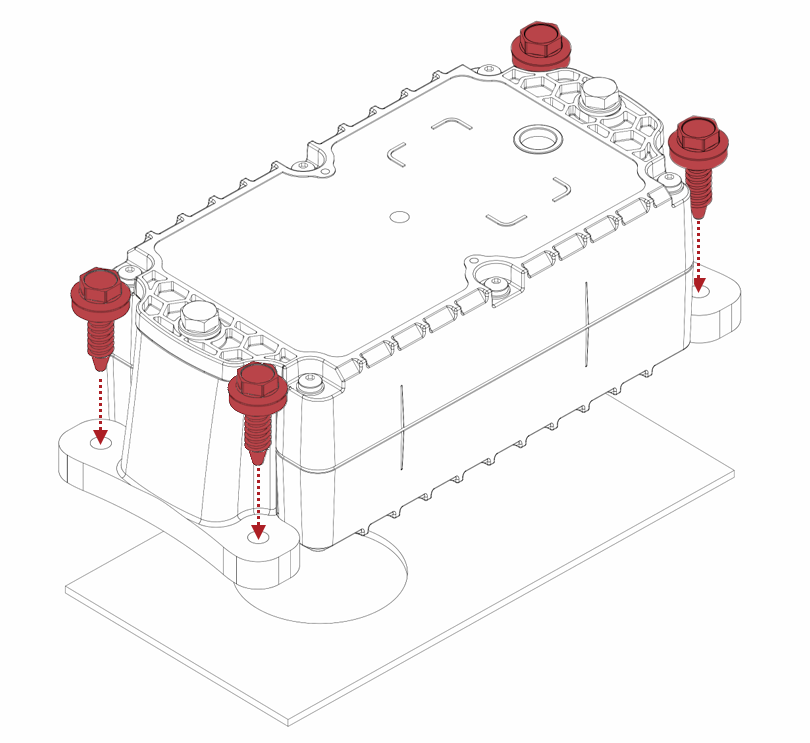
Place your device in the intended location and mark the centers of the two mounting holes on the intended surface
Use the 6.5 mm drill bit to drill two through holes at the marked locations
Clean the drilled holes thoroughly with a deburring tool
Place your device at the intended location
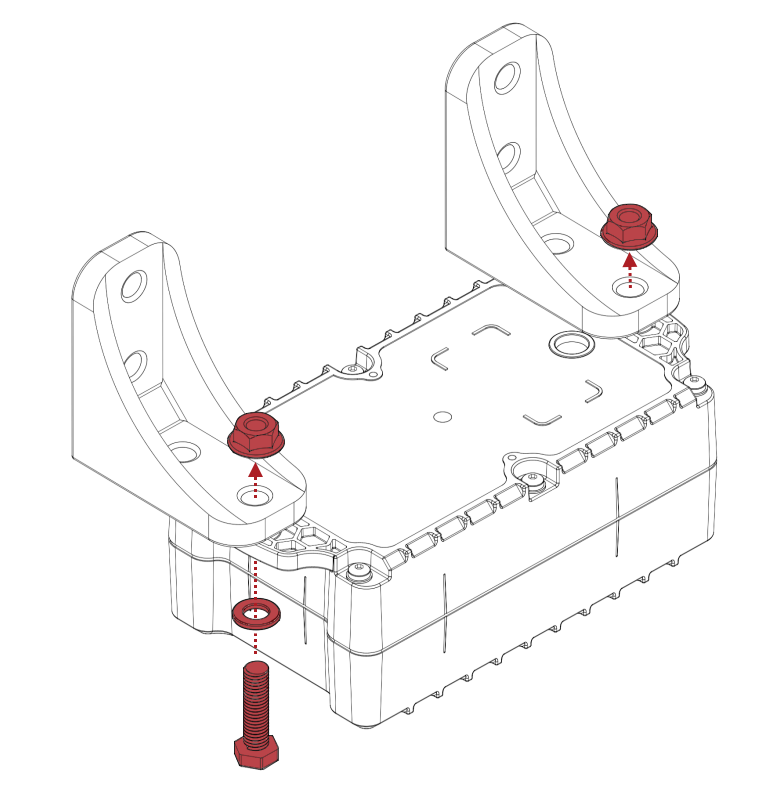
Pass the bolts through the flat washers and your device
Use the 10 mm hexagon socket and the 10 mm spanner to tighten the two serrated nuts onto the bolts as shown below
Option 6: Structural adhesive
This installation method is preferred when the IoT Pro must be installed onto a flat plastic or fiberglass surface which cannot be drilled
Holding Strength: Medium to high, depending on the condition of the mating surface
What you’ll need
1x Bond and Seal All-In-One (https://eshop.wuerth.com.mt/seam-sealing-bond-and-seal-all-in-one-2)
8 mm Hexagon Socket
1x Sheet of Marine Wood (150 x 90 x 20 mm)
Installation Instructions
Ensure that the mating surfaces are clean, dry and free from dust, grease and rust
Apply bond and seal to the marine wood and clamp it to the intended installation surface
Allow approximately 20 minutes for the bond and seal to dry sufficiently
Centre your device on the marine wood and drill the two self-drill screws into the surface as shown below
Ensure that the device is attached securely to the surface before proceeding
Option 7: Magnets to a metal surface
This installation method is preferred when the IoT Pro must be installed onto metal surface which cannot be drilled
Holding Strength: Medium, limited to the magnet’s holding force (approximately 9 kg depending on the condition of the mating surface)
What you’ll need
2x M4 Flat Washers (https://eshop.wuerth.com.mt/washer-with-large-outside-diameter-13)
7 mm Spanner
Installation Instructions
Ensure that the mating surfaces are clean, dry and free from dust, grease and rust
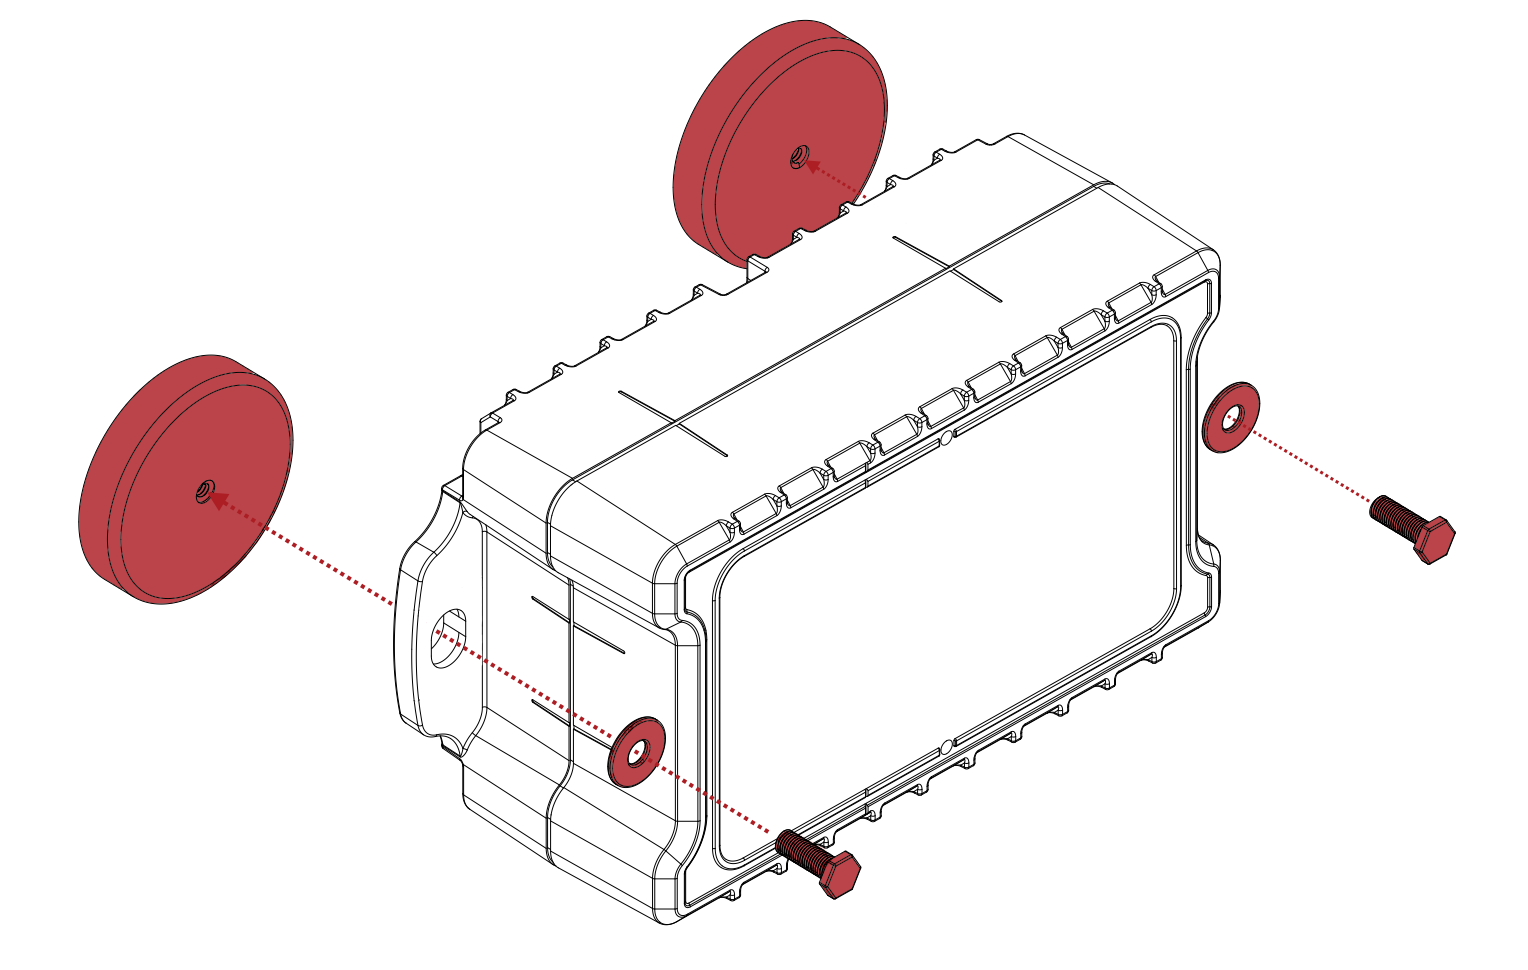
Install the two magnets as shown below and tighten the bolts with a 7 mm spanner
Attach your device at the intended location by using the installed magnets
Ensure that the device is attached securely to the surface before proceeding
Option 8: Double-sided adhesive tape
This installation method is preferred when the IoT Pro must be installed onto a flat surface which is indoors and cannot be drilled
Holding Strength: Low, should only be used indoors with no environmental vibrations and exposure to high temperatures
What you’ll need
2x Double-sided Tape Pieces (https://eshop.wuerth.com.mt/assembly-tape-power-power-transp-25mm-894909025)
Installation Instructions
Ensure that the mating surfaces are clean, dry and free from dust, grease and rust
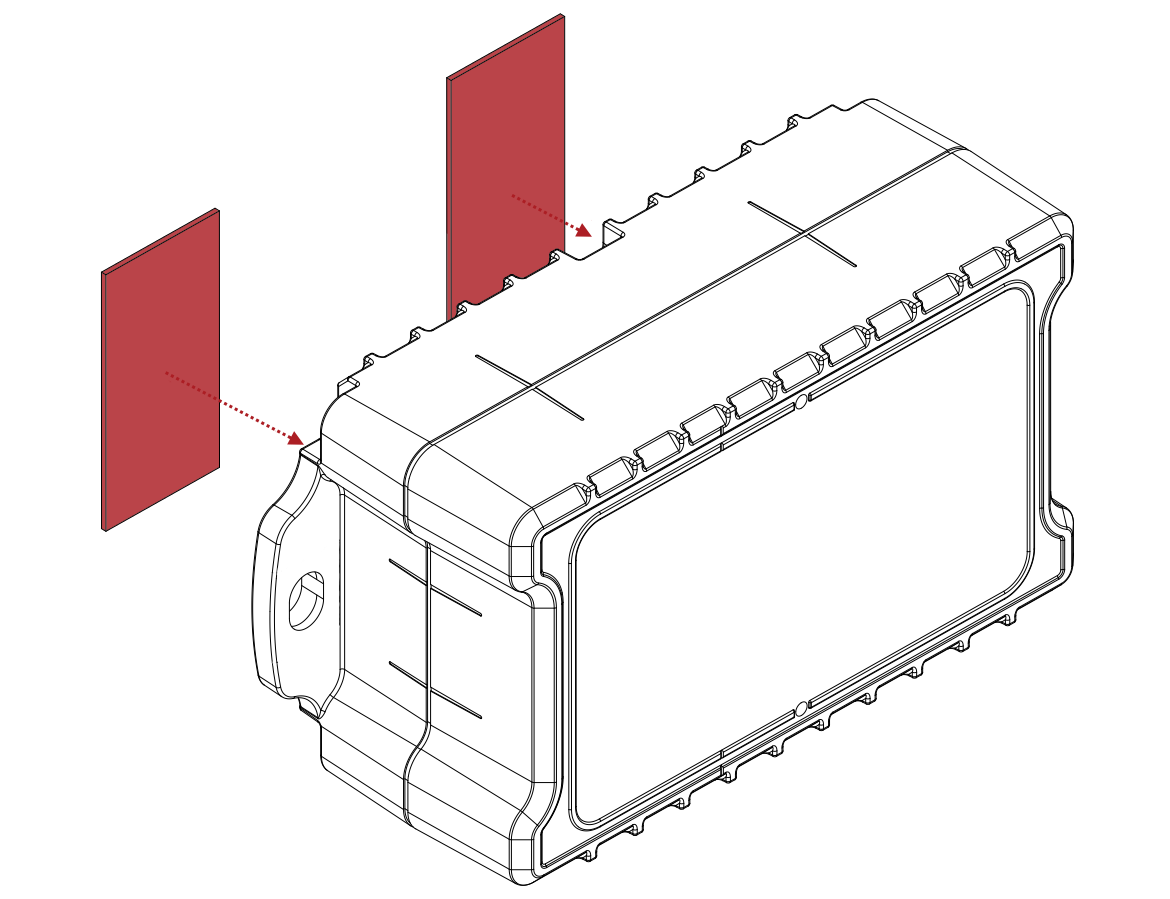
Cut two 50 mm long pieces from the double-sided tape
Attach the two pieces to your device as shown below
Attach your device to the installation surface by pressing firmly
Ensure that the device is attached securely to the surface before proceeding
Option 9: IoT Pro face down
This installation method is preferred when the IoT Pro has the internal GPS option or will be used in distance sensing applications (level sensing for tanks/ wells etc.)
Option A: Bolted to the surface
What you’ll need
2x Brackets (provided by IoT Solutions)
2x M5 Flat Washers (https://eshop.wuerth.com.mt/flat-washer-for-hexagon-bolts-and-nuts-44)
50 mm Cylinder Saw if your device will be used in distance sensing applications (https://eshop.wuerth.com.mt/cylinder-saw-hss-bi-metal-longlife-speed-hsco8-10)
1x Gasket if your device will be used in distance sensing applications
Installation Instructions
Assemble the provided brackets onto your device with the M5 hardware as shown
If your device will not be used for distance sensing applications, skip to step 3
Mark the ideal position for your device such that there is an unobstructed line of sight perpendicular to the liquid in the tank/ well etc. and drill a 50 mm diameter hole with the cylinder saw
Place the provided gasket onto the surface, with the radar hole corresponding to the hole drilled previously
Install your device with the attached brackets onto the installation surface with the self-drill screws
For distance sensing applications, ensure that your device is oriented correctly on the gasket as shown
Option B: Perpendicular to the surface
What you’ll need
2x Brackets (can be customized according to customer requirements)
2x M6 Flat Washers (https://eshop.wuerth.com.mt/flat-washer-for-hexagon-bolts-and-nuts-44)
2x M6 Serrated Nuts (https://eshop.wuerth.com.mt/serrated-locking-nut-4)
Plastic Anchors / Self-drill Screws depending on the installation surface
10 mm Hexagon Socket
10 mm Spanner
Installation Instructions
Assemble the provided brackets onto your device using the M6 hardware as shown
Identify the ideal location for the installation and mark the corresponding bracket holes onto the surface
Use plastic anchors or self-drill screws to securely attach the brackets and your device to the installation surface
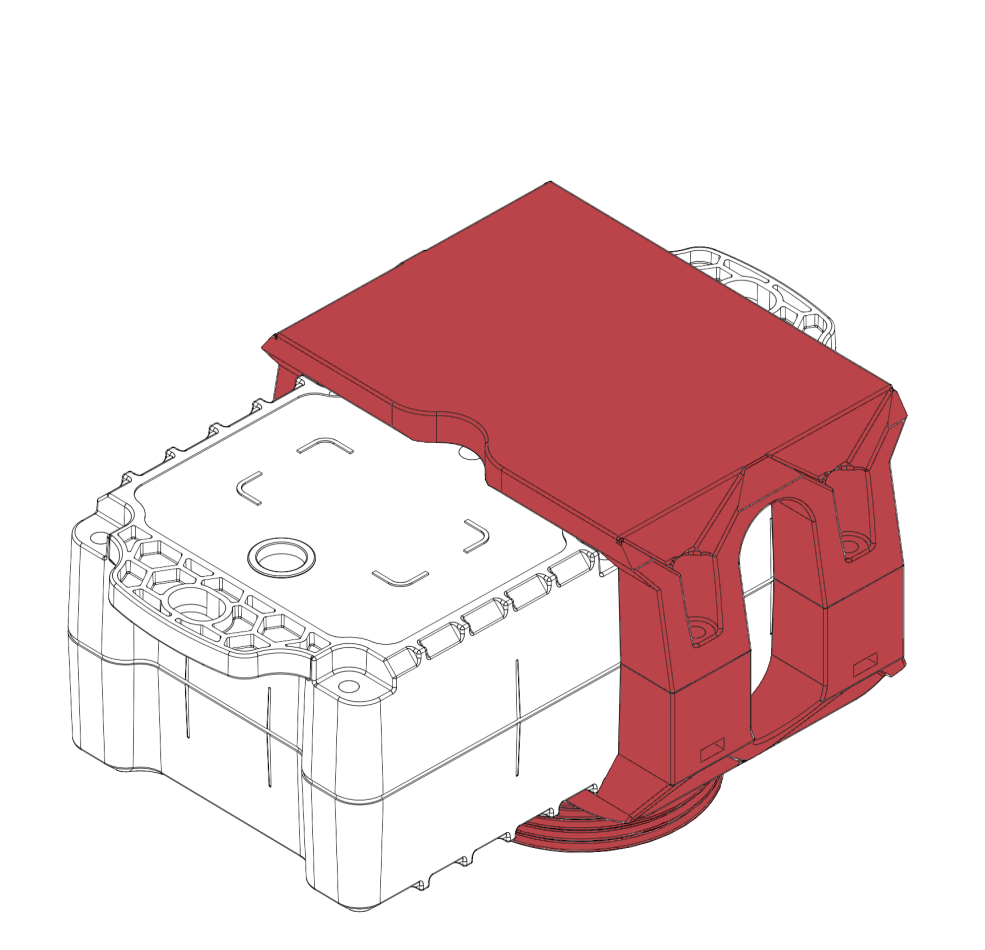
Option 10: IoT Pro with threaded attachment
This installation method is preferred when the IoT Pro will be used in distance sensing applications (level sensing for tanks/ wells etc.)
Option A: A standard threaded fitting is available at the top of the tank/ well etc.
What you’ll need
1x Threaded Attachment (thread provided according to customer requirements)
Installation Instructions
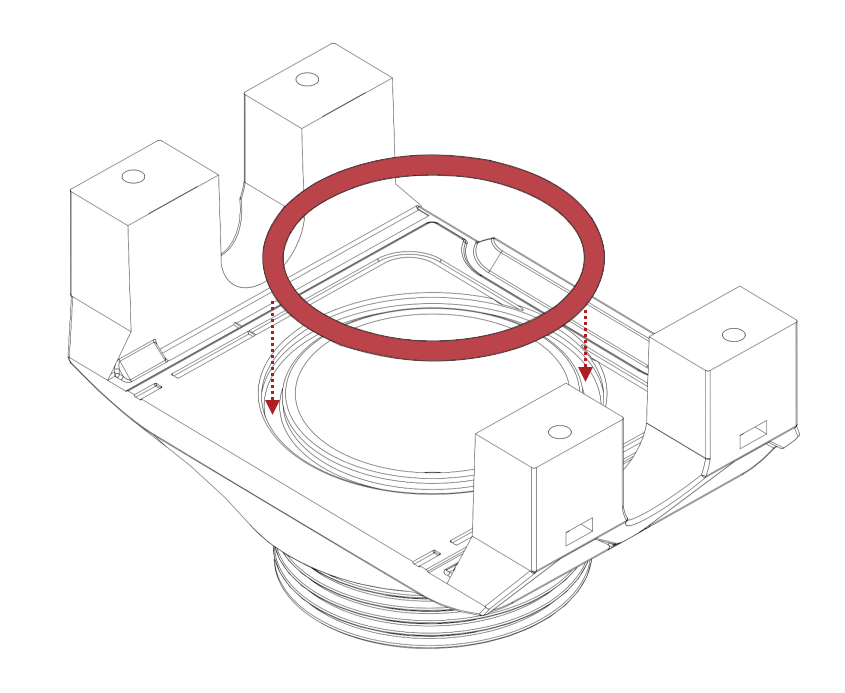
Ensure that the provided O-ring is firmly seated in its recess in the threaded attachment as shown
Assemble the threaded attachment onto your device
Ensure that the attachment is assembled correctly - the silver label on the bottom should be fully exposed as shown
Install the provided screws with flat washer and tighten to 0.5±0.05 Nm with a calibrated torque wrench
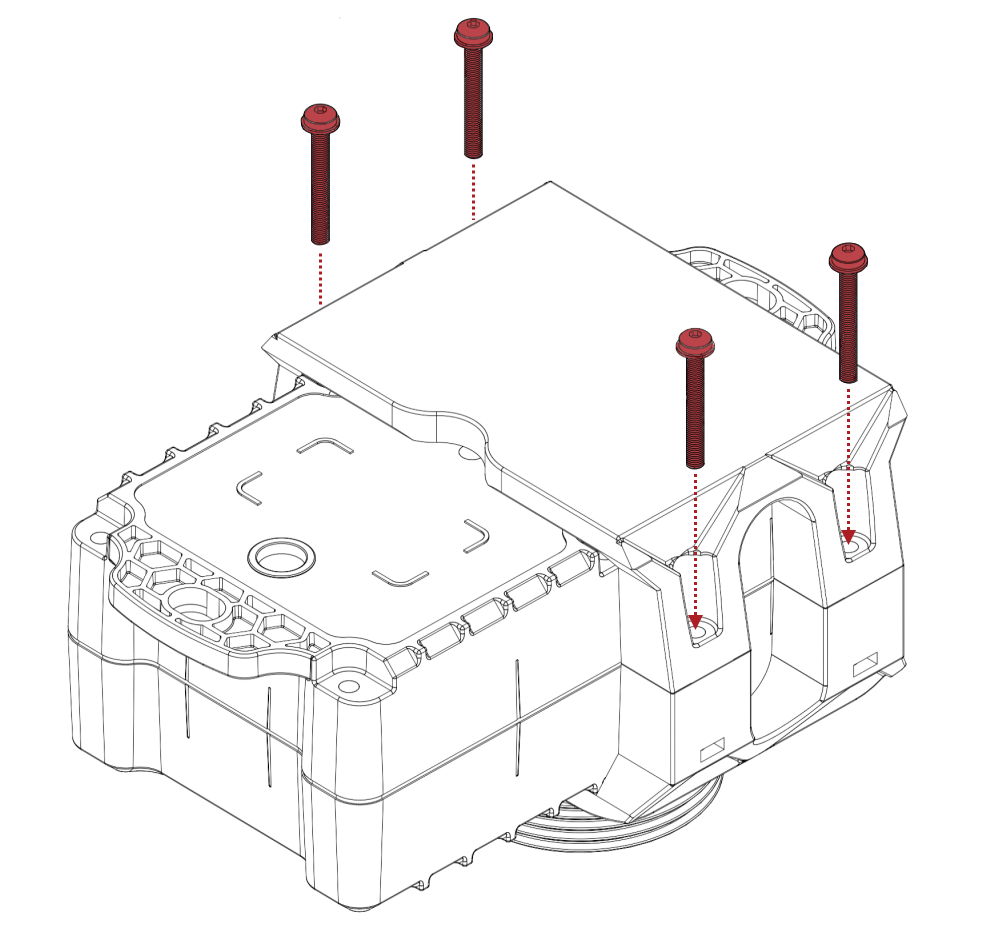
Ensure that the second provided O-ring is seated in place as shown

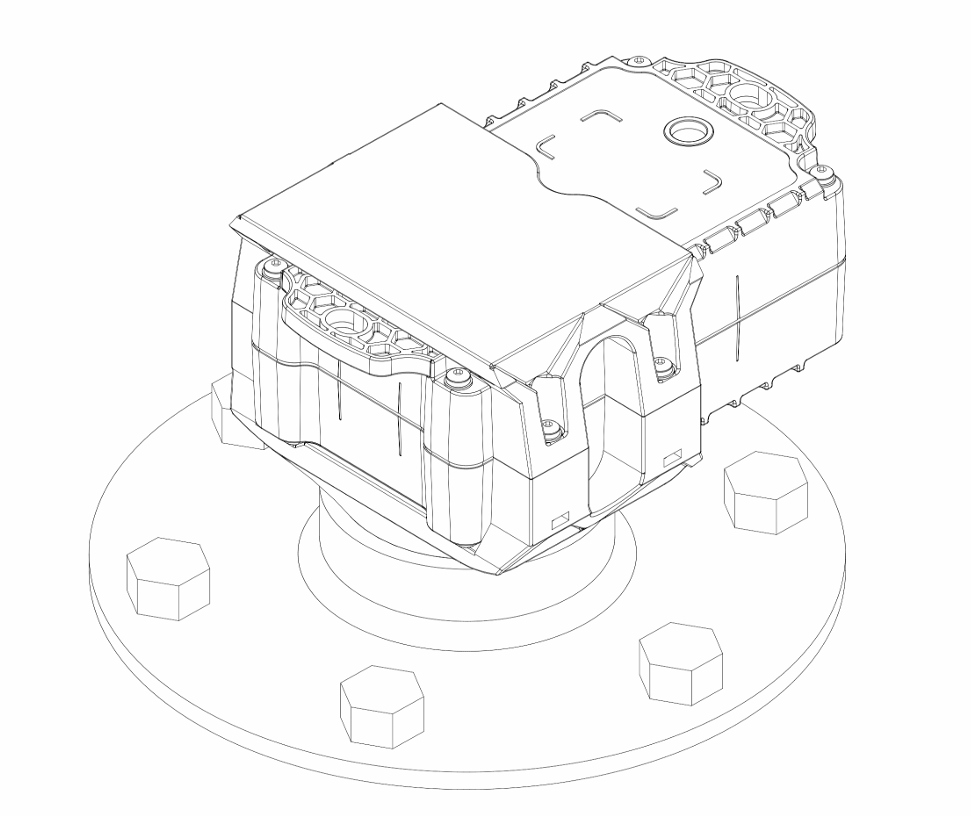
Install your device onto the identified fitting and tighten by hand until the threaded attachment seats fully onto the fitting
Do not apply excessive force whilst tightening your device onto the fitting to prevent any damages from occurring to the threaded attachment
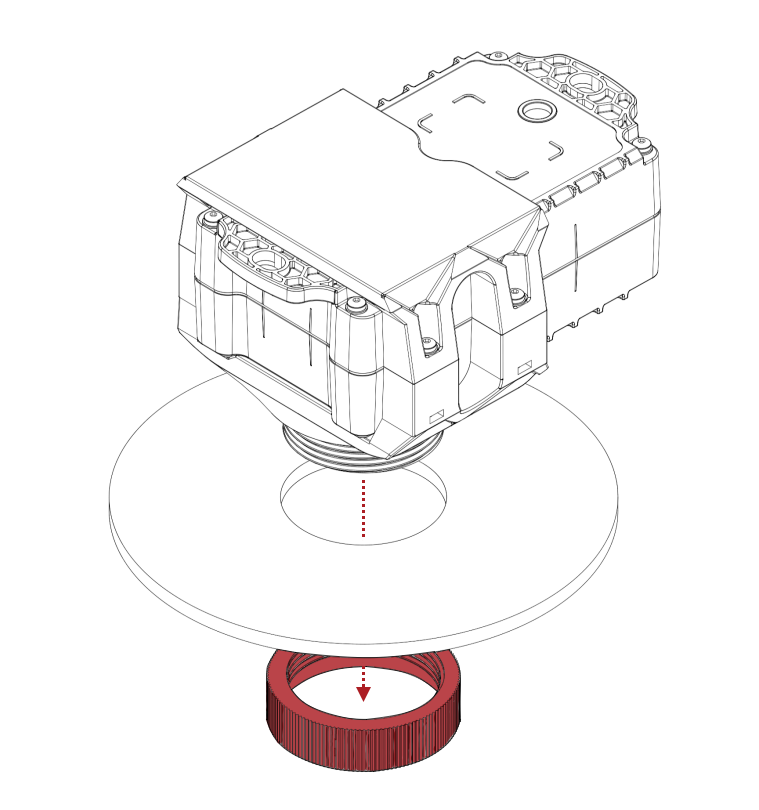
Option B: A removeable lid is available at the top of the tank/ well etc.
What you’ll need
1x Threaded Attachment (1.5 inch BSP thread)
1x Nut (1.5 inch BSP thread)
46 mm Cylinder Saw (https://eshop.wuerth.com.mt/cylinder-saw-hss-bi-metal-longlife-speed-hsco8-25)
Half round file (https://eshop.wuerth.com.mt/half-round-file-6)
Installation Instructions
Steps 1 to 4 from Option A should first be followed to assemble the threaded attachment onto your device if not delivered pre-assembled
Remove the lid/ installation surface and mark the ideal position for your device such that there is an unobstructed line of sight perpendicular to the liquid in the tank/ well etc.
Drill a 46 mm diameter hole with the cylinder saw at the marked location
Use the half round file to remove any burrs and slightly widen the hole to ~47 mm diameter such that the threaded attachment can pass through the hole
Assemble the threaded attachment onto the hole with the nut from the underside of the lid as shown
Option C: Threaded flange attached to the tank/ well etc.
What you’ll need
1x Threaded Attachment (1.5 inch BSP thread)
1x Flange (1.5 inch BSP thread)
50 mm Cylinder Saw (https://eshop.wuerth.com.mt/cylinder-saw-hss-bi-metal-longlife-speed-hsco8-10)
Half round file (https://eshop.wuerth.com.mt/half-round-file-6)
Installation Instructions
Steps 1 to 4 from Option A should first be followed to assemble the threaded attachment onto your device if not delivered pre-assembled
Mark the ideal position for your device such that there is an unobstructed line of sight perpendicular to the liquid in the tank/ well etc.
Drill a 50 mm diameter hole with the cylinder saw at the marked location
Position the provided flange at the center of the drilled hole and install 5x self-drill screw in a star pattern
Ensure that the flange has both provided O-rings seated correctly before installing
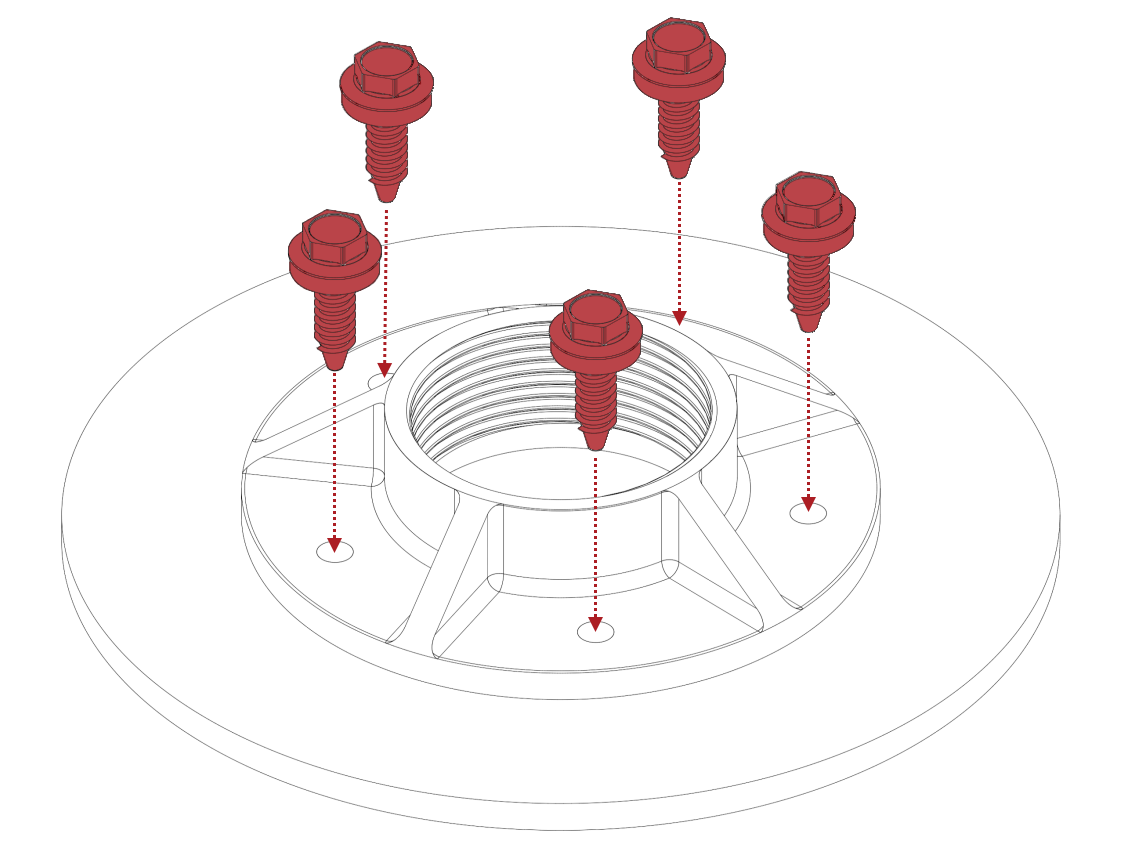
Assemble the threaded attachment onto the flange as shown
Do not apply excessive force whilst tightening your device onto the flange to prevent any damages from occurring to the threaded attachment