IoT Pro Hardware - Quick Start
We'll walk you through power-up, initial configuration, and connecting your device to the cloud—then guide you to your specific solution setup.
What you’ll need
IoT Pro Device (get in touch with our team members from IoT Solutions Website - Contact Us)
IoT Pro Mobile Application (available from the Downloads section)
External Antenna (required only if the device has an external antenna option)
External Power Supply (required only if the device has an external supply option)
Micro SIM Card (required only if the device is cellular and the device is shipped without a SIM Card)
T10 Torx Screwdriver (required only if you need to open the device for external power supply, micro SIM card, or internal sensor wiring)
Preparing your device
Skip this section if your device was shipped without an External Antenna
Connect an External Antenna IoT Pro Antenna Options
Skip this section if your device was shipped without an External Supply option
Open the device as explained in Opening and Closing
Connect the External Power Powering Options
Close the Device Opening and Closing
Skip this section if your device is LoRa or SIGFOX or is Cellular and was shipped with a SIM Card option
Open the device as explained in Opening and Closing
Install the SIM Card SIM Card Installation
Close the Device Opening and Closing
Activating your Device (Cellular)
Open the IoT Pro Mobile Application and enter IOT PRO - ACTIVATE
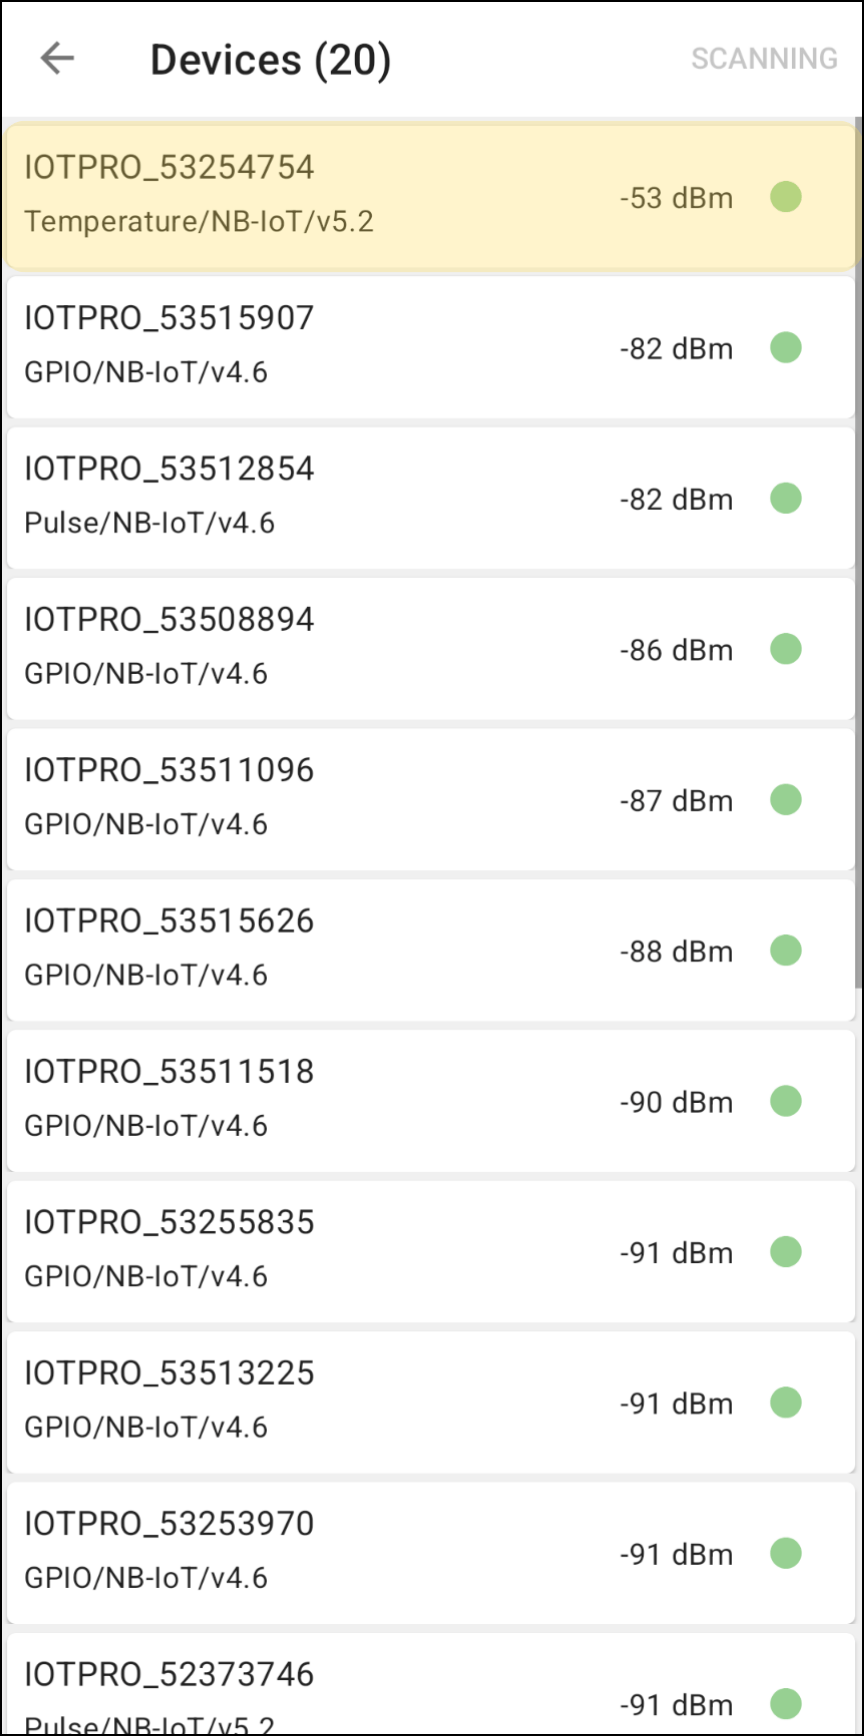
The application will start scanning for nearby devices. Look for your device named IOTPRO_XXXXXXXX - match the last 8 characters with the last 8 characters of the device ID shown on the silver label on the top of the device.
Select your device and wait until it shows Connected in the top bar
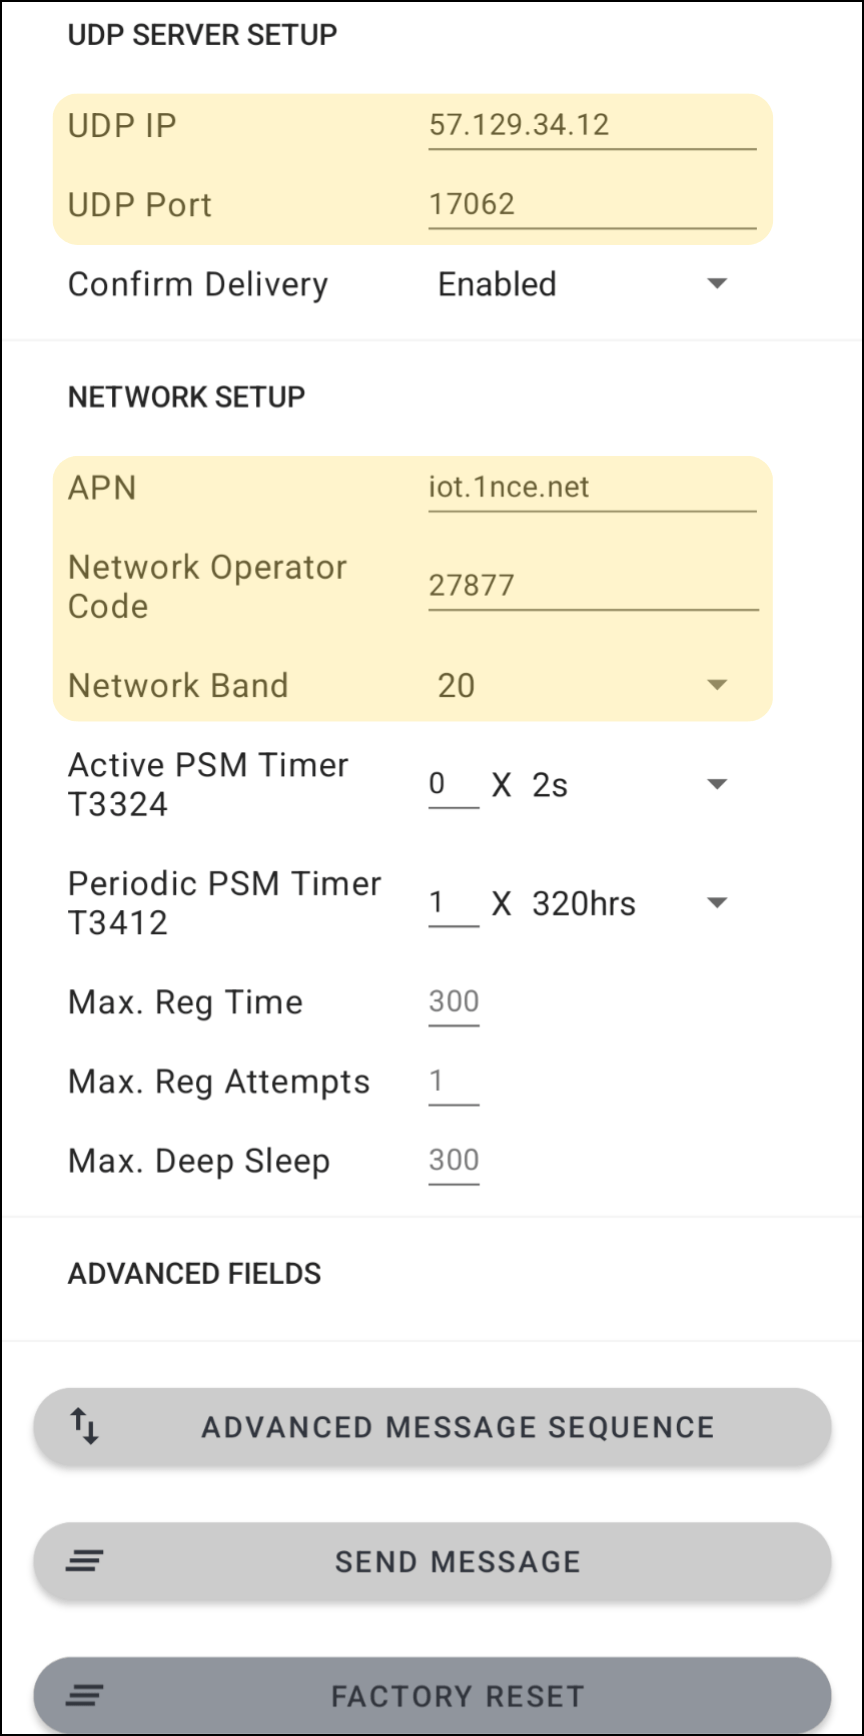
Scroll down and configure the following network settings:
UDP IP: 57.129.34.12 (If you need to connect to IoT Pro Software)
UDP Port: 17062 (If you need to connect to IoT Pro Software)
If network roaming is not necessary or the same network operator will be used throughout the device operation, it is highly suggested to enter a fixed APN, Network Operator Code and Band. This avoids connecting to the wrong operator and improves network connectivity.
APN: iot.1nce.net (if your device was shipped with a SIM Card) or check for the APN with your network operator.
This should be left empty if unknown or if network roaming from one operator to another is needed
Network Operator Code: Get the network operator code using an AI tool or check here and enter the MCC followed by MNC
Example: Melita (Malta) has MCC 278 and MNC 77, so enter: 27877
This should be left empty if unknown or if network roaming from one operator to another is needed
Network Band: 20 (most common for EU networks) - Get the Network Band using an AI tool and confirm with the network operator if necessary.
All should be selected if unknown or if network roaming from one operator to another is needed
Press Activate at the bottom of the page
Under normal conditions the device will take 1-2 minutes to register
Do not attempt to reconnect during this time - the device will not be discoverable via Bluetooth and may take up to 5 minutes (according to the maximum registration time)

After 1-2 minutes, start scanning again and reconnect to your device
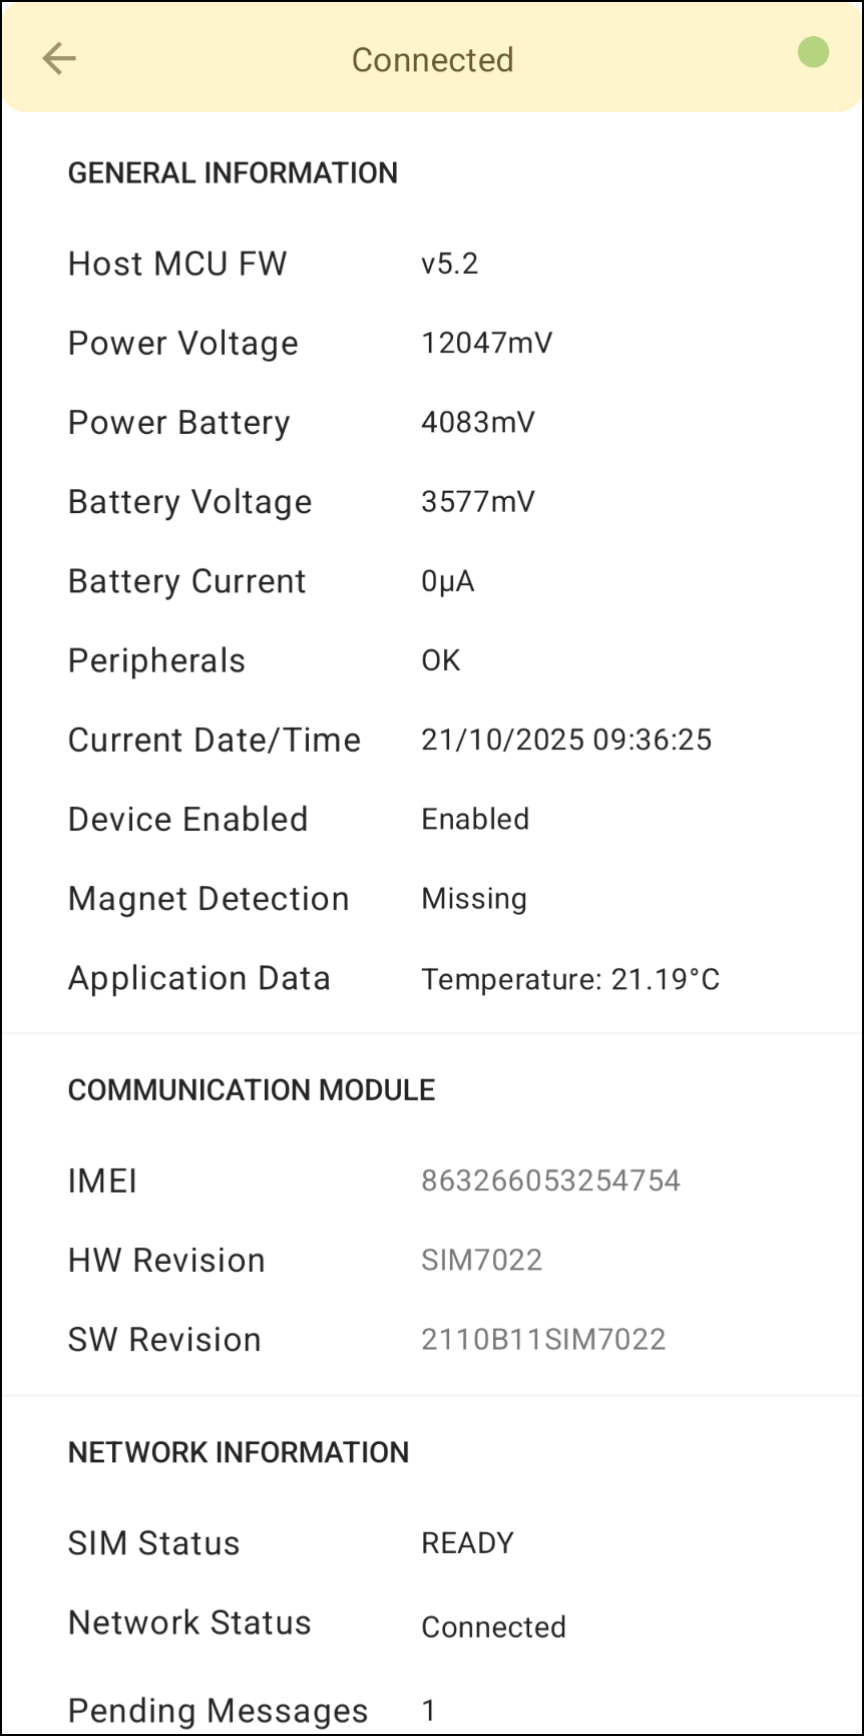
Verify that Network Status shows “Connected”
If not, refer to our FAQ - Network Connection section

Once connected, send a message by pressing Send Message at the bottom of the page
Wait approximately 10 seconds before reconnecting (the device will not be discoverable via Bluetooth during this time)

Reconnect to your device and verify message delivery:
Check that Pending Messages shows 0
If not 0, check Time until next transmit - it should be under 1 minute

If Pending Messages = 0: Your device is ready and should now appear online on the Online Platform.
If Pending Messages ≠ 0 and Time until next transmit is high: The device is having issues communicating with our server. Check the FAQ - Network Connection for troubleshooting steps.

Your IoT Pro device is now activated and communicating with our Online Platform. Visit the Online Platform to start monitoring your device.
Go to Solutions to learn more about installing your specific solution.